Wednesday, April 30, 2014

Over thinking- LSG Sprays on Canvas

So for the 3rd month in a row, I have been over thinking my project for the LSG monthly color Challenge. Since I am just starting my collection, I have to order the products. While I wait for them to be sent, I think about all the things I can do for a project...
I OVER think it. Then I make something, and it is not what I pictured so I wait and make something else. Then I end up waiting until the last minute. Not sure what is wrong with me.

Well, I finally made a project yesterday that I really like.

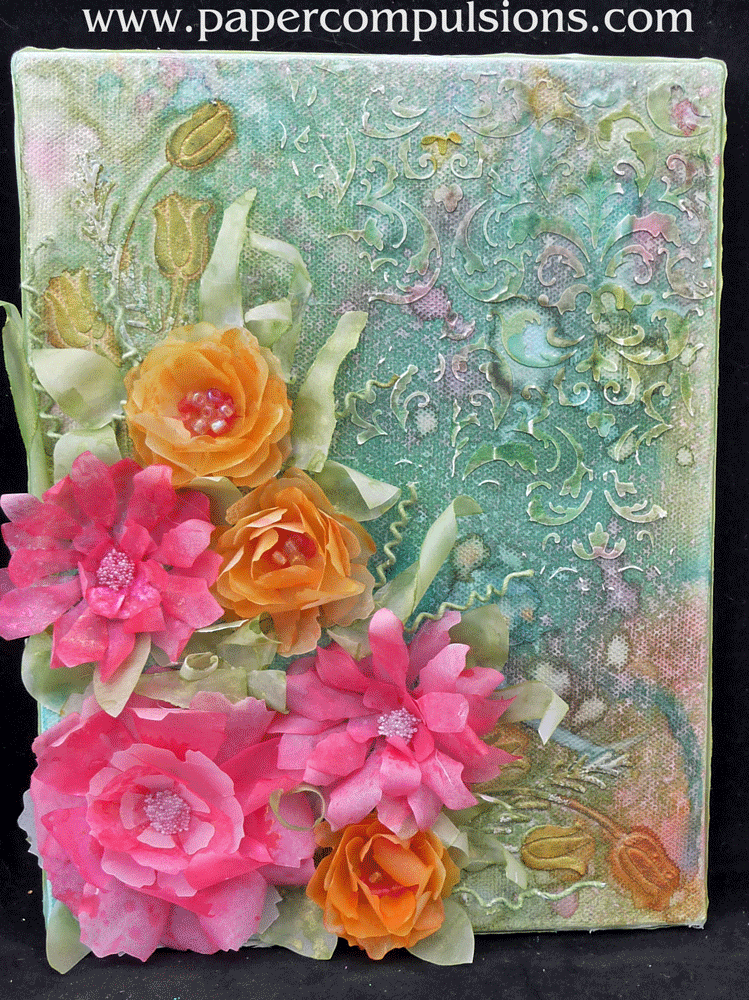
My first ever canvas and I am kinda' lovin' it.

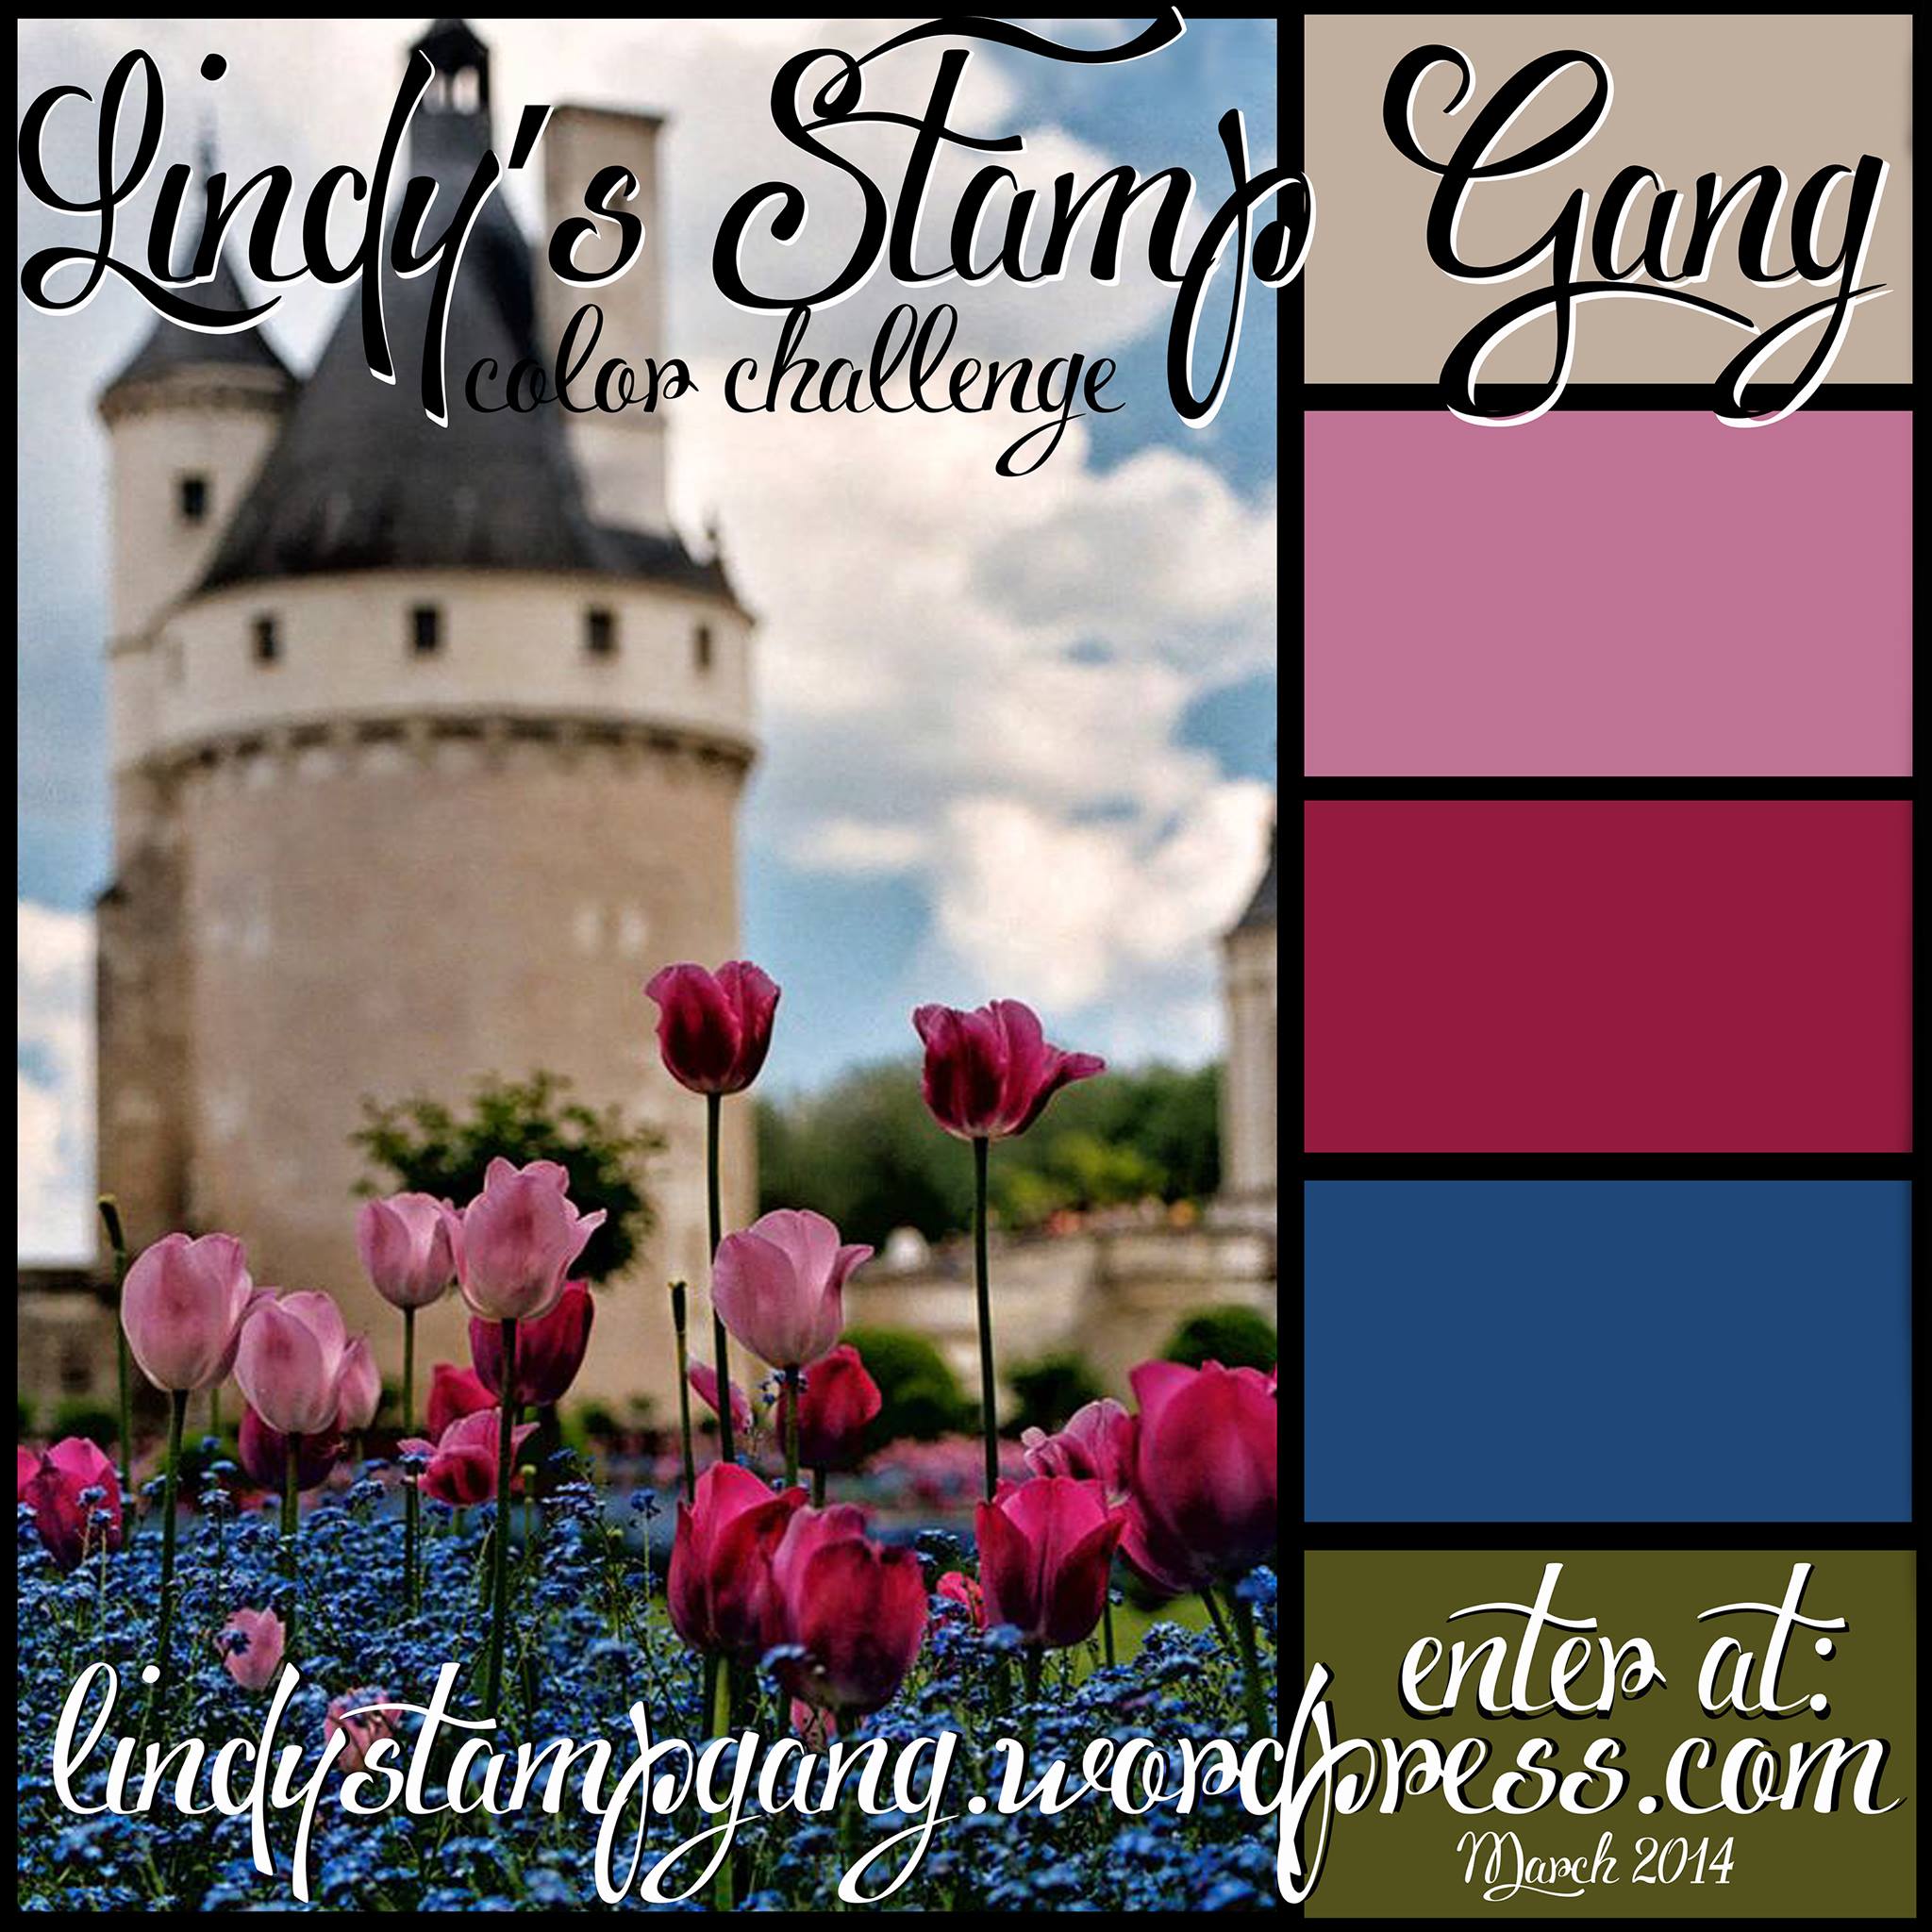
These where the colors for the April Color Challenge


Here are the LSG sprays that I used:


You can check it all out on the LSG blog.

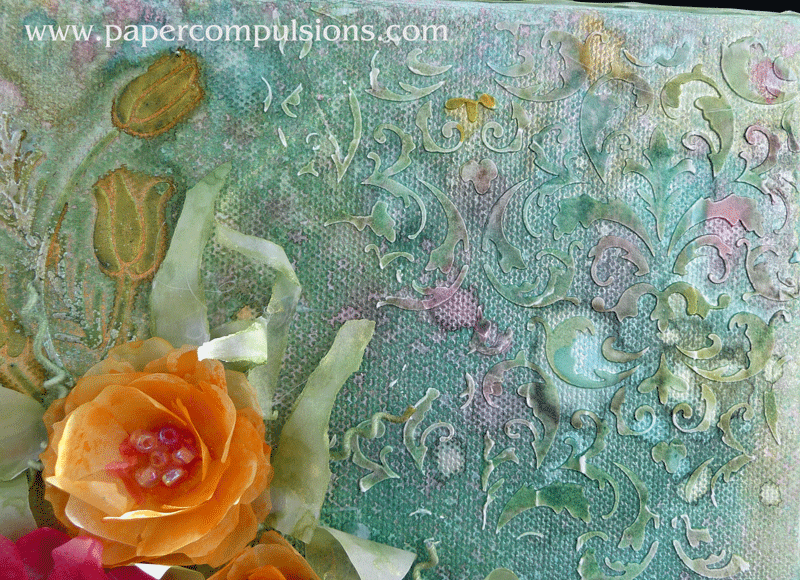
Here is a close up where you can see the colors.


Since I did not really know what I was doing...I was not afraid to try play and new things.
I sprayed the canvas. Then added more, then ended up washing color out from adding more on top. LOL In the end, I liked the colors and patterns. 
You can see that I applied Golden Light Modeling Paste through a Prima Damask stencil over the sprayed canvas and it soaked up the colors that were underneath it. Then I added a little more with a paintbrush just to get it where I wanted.

 Here you can see where I added the same paste through a TCW Wildflowers stencil and then painted over it with a brush.

Check out these flowers...
 I used vellum. I die cut the flower shapes with a TH  and sprayed them with
I added little squirts of  Alpine Ice Rose on the pink flowers and Marigold Yellow Orange to the yellow flowers just to get a little color variation.
I made the centers darker by dabbing on more Ramblin’ Rose Pink then added glass beads and micro beads.

 For the leaves, I tore strips of vellum and sprayed them with Edelweiss Moss Green.
If you look closely, you can see where I sprayed white cloth wrapped wire with the green and made little tendrils.


So what am I taking from this?

 I am going to TRY really hard to stop over thinking things. What I picture in my head rarely ever comes out the same in real life. I am going to try to just play more and have fun with it. :)

Process videos will have to come later next week.

Sunday, April 27, 2014

Clay Roses Tutorial

I have been having so much fun playing with all my crafty goodies from Scrapadabadoo. I have been wanting to make a video tutorial on making clay roses for a while. With my physical problems I have to work a little then rest. I have slowly gotten all this together piece by piece.I think you will really like it.


Here is a short video showing how I put this magnet together.
(I figured out how to add music to my videos. YAY ME! LOL)

Clay Rose Magnet


Here is another video showing how to color your white air dry clay with Lindy's Stamp Gang sprays.

Coloring Clay with LSG Sprays 


And now for the video showing how to make a full rose.

Clay Rose Tutorial


And here is the last video showing how to make the rose buds and leaves.

Clay rose buds and leaves


I got all my supplies from Scrapadabadoo.

Supplies


(could also use) Fimo Classic Clay White

Lindy’s Stamp Gang Sprays

( could also use) Provo Craft Cricut Spatula

  
Clay Rose Magnet Supplies


Even the lid came from something I ordered from Scrapa LOL.

Hope you enjoy these videos and make some lovely clay roses.

Thursday, April 24, 2014

Double Pocket Card

Hello crafty friends. I have a cool little card to share today. It is a double criss cross
pocket card.

It is for a challenge over on the Scrapadabadoo Face Book page.
You can get the instructions for the card there on the page.


Once I made the basic card, I made a few cut files for the decorative panels, tags, and flowers. You can download the cut files and pdf templates for them below.

Tags, panels, and flowers for the Criss Cross Double Pocket Card.

I have instructions on how to make the flowers on the Scrapadabadoo blog.

I cut everything form white cardstock and colored all but the top layer of the tags with 
Lindy's Stamp Gang sprays.

Ramblin’ Rose Pink
Edelweiss Moss Green (Scrapadabadoo does not have this green, but Greased Lightning Green or any of their other greens would work well also.)

The top (blue) panels are embossed with an Anna Griffin Poppy embossing folder.

I realized that my tags would fit perfectly in the TH Scrollworks embossing strip.

Then I inked the edges with TH Salty Ocean Distress Ink. I topped the tags off with seam binding that I colored with LSG Ramblin Rose Pink.


I am loving this color combo.
I think I will just keep using it. LOL

Saturday, April 19, 2014

First DT post on Scrapadabadoo Today

Hello my crafty friends.
Today is my first post on the Scrapadabadoo blog as a design team member. 

YAY!

I am showing how to make some of the flowers on these cards


Please go by the Scrapadabadoo website and download the free PDF file that shows and explains the steps. 

I will be sharing more instructions on the flowers and the cards later.
You can also check out my video flowers tutorials here and my written instructions here.

I also have tutorials on special folding cards here.  

I plan to do several flower tutorials and even introduce new flowers soon.

You can download the pdf instructions on the Scrapadabadoo blog.
Here is a copy of the cut files used.

Sunday, April 13, 2014

Forgot the link

Oops! I forgot to add the link to the decorated gift box files in my last post. They are available in my Etsy shop.

Also, I posted a link to the online shop that I get my boxes from in the comments of a post a few weeks ago. I thought I would post the link here as well...

I get the boxes for my 8.5 by 5.5 cards at Paper Mart. They are called "jewelry" boxes. I have purchased the Kraft boxes before and recently purchased the Gold Floral. The gold boxes are a little bit more expensive but they are absolutely beautiful. (so the extra cost is worth it to me) The Kraft boxes in the 5 5/8 by 8 5/8 inches by 1 3/8 inches are out of stock until May. I believe any of the "jewelry" boxes that size would the the same quality.

Let me know if you have any questions. I am always happy to help :)

Decorated Gift Box


Hello my crafty friends. I did not realize it had been so long since I posted. I have been busy crafting and taking pictures but forgetting to post. Oh well, I promise to catch up.

I made this lovely decorated gift box for the Scrapadabadoo FB challenge. Last Monday they started having challenges every other Monday. It is all just for fun. No pressure. The current challenge is a grid challenge where you pick three items in a row from the grid.
I decided to pick the 3 on the left; flowers, ribbon, and bows.

I cut the gift box and the decorative panels out with cut files that I made. You can get the cut files here.  There is also a 12 minute video if you are interested in how I put it together.


 I made the flowers using my Open Rose and Pretty Flower files and techniques.


I was lucky enough to be chosen for the Scrapadabadoo Design Team !
I will be posting lots of new projects soon. 

Papers Used:


Tuesday, April 1, 2014

Lindy's Stamp Gang March Color Challenge

I have been having fun playing with my Lindy's Stamp Gang sprays and embossing powders. I made a project for the March Color Challenge


You can head over to the Lindy's Stamp Gang Blog to check it out.

The Lindy's shimmery goodness does not show up well in the pictures, but it really wows in person. 


 The idea started out as a card but transformed into a luminary using cardstock, chipboard, vellum, and of course LSG products.
Here you can see the different colors created when the battery operated tea light alternates hues. So pretty!

This project sort of took on a life of it's own. I added more and more as I went. It was fun though. I made an arched window cut file and used my own bird and flower cut files. The base is chipboard covered in white cardstock then sprayed with  I'm Late, I'm Late Slate  then spritzed with Silent Night Silver. I used a Crafter's Workshop brick stencil and applied Golden Light Modeling Paste. When the paste was dry, I brushed the Slate and Silver on the bricks with a water brush. A little watered down  Midnight Rendezvous Raven allowed me to add some shadows. I added patches of Silver Moon Turquoise embossing powder for a little more glam and depth.


I made REALLY SMALL handmade Regal Roses from white cardstock sprayed with
Alpine Ice Rose and Hibiscus Rose


The leaves and vines were also cut from white cardstock and colored with 
Green with Envy Green spray. The tiny vine and tendrils were made with cloth covered florist wire that I stained with Green with Envy Green. That cute little birdie looks great in Bachelor Button Blue.

The stained glass window is vellum sprayed with the Bachelor Button Blue, Alpine Ice Rose, Hibiscus Rose, and I'm Late, I'm Late Slate.

On the inside, I sprayed the brick stencil with the slate and laid the stencil on top like a type of stamp.


You can check out the March entries and join in on the April challenge over at the  
Lindy's Stamp Gang Blog


Lindy's Stamp Gang products used:

Sprays

Alpine Ice Rose
Hibiscus Rose
Bachelor Button Blue
Green with Envy Green
I'm Late, I'm Late Slate
Silent Night Silver
Midnight Rendezvous Raven

Embossing powder

Silver Moon Turquoise